Introduction: Beyond Baking – The Transformative Power of Roasting Fish
In the culinary lexicon, the terms “baking” and “roasting” are often used interchangeably, particularly when it comes to fish. A recipe might call for “baked cod,” while another suggests “roasted salmon,” leaving the home cook to wonder if there is any meaningful difference. The distinction, while subtle, is the very foundation of culinary mastery. To view roasting not as a passive act of placing fish in an oven, but as an active, dynamic technique is to unlock a world of unparalleled flavor, texture, and color.
This guide serves as a comprehensive manifesto on the art and science of roasting fish. It moves beyond simple instructions to explore the fundamental principles that govern this transformative cooking method. The journey will begin with the foundational science—the chemical reactions that create the golden-brown crusts and complex aromas that define a perfect roast.
It will then navigate the practical applications of these principles, offering a masterclass in everything from selecting the ideal fillet to executing advanced techniques for whole fish. By understanding the interplay of heat, air, and moisture, the cook learns to control the outcome, transforming a simple piece of fish into a dish that is at once rustic and refined. This is the roaster’s compass, a definitive guide to achieving consistent, spectacular results and unlocking the full, delicious potential of fish.
Table of Contents
Section 1: The Anatomy of a Roast – Understanding the Fundamentals
1.1 What is Roasting? A Matter of Heat and Air
At its core, roasting is a dry-heat cooking method characterized by the use of indirect, diffused heat to cook food evenly from all sides.3 This process takes place in an enclosed environment, most commonly a modern oven, where hot air circulates and completely envelops the ingredient. Historically, roasting was one of the most primitive forms of cooking, involving meat or birds turned on a spit over an open fire. While the technology has evolved from hearths to convection ovens, the fundamental principle remains unchanged: cooking with the pervasive, dry heat of the air itself.
A critical parameter that defines roasting is temperature. The process generally begins at a temperature of at least $300^{\circ}$F ($150^{\circ}$C). However, to achieve the signature browning and crisp crust that is the hallmark of a true roast, temperatures are often set significantly higher, typically in the range of $400^{\circ}$F to $450^{\circ}$F ($200^{\circ}$C to $230^{\circ}$C).
This high-heat environment is what distinguishes roasting from gentler, lower-temperature cooking methods and sets the stage for the profound chemical transformations that create its unique flavors and textures.
1.2 The Alchemist’s Fire: Unlocking Flavor with Maillard and Caramelization
The seemingly magical transformation of a pale, raw ingredient into a deeply browned, aromatic, and intensely flavorful roast is not magic at all, but rather a series of predictable and manageable chemical reactions. Understanding these processes empowers the cook to move from hoping for a good result to engineering one. The two key reactions are the Maillard reaction and caramelization.
The Maillard reaction is a complex chemical cascade that occurs between amino acids (the building blocks of protein) and reducing sugars when they are subjected to heat.
This reaction is responsible for the savory, toasty, and nutty flavors found in a vast array of cooked foods, from the crust of bread to grilled meats and, of course, roasted fish.4 The process typically begins when the surface of the food reaches temperatures between
$284^{\circ}$F and $356^{\circ}$F ($140^{\circ}$C and $180^{\circ}$C). As the reaction progresses, hundreds of new aroma and flavor compounds are generated, creating a depth and complexity that cannot be achieved through other means.
Caramelization, on the other hand, is a distinct process that involves the thermal decomposition of sugars alone. It occurs at higher temperatures than the Maillard reaction, generally starting around $340^{\circ}$F ($170^{\circ}$C). This browning of sugar creates notes of sweetness, nuttiness, and even a slight, pleasant bitterness, adding another layer of complexity to the final dish.
The critical factor that governs both of these browning reactions is moisture. The surface of any food that contains water cannot, by the laws of physics, exceed the boiling point of water—$212^{\circ}$F ($100^{\circ}$C)—until all of that surface moisture has evaporated.
Since the Maillard reaction and caramelization require temperatures well above this threshold, a wet surface effectively prevents browning. The oven’s energy must first be spent turning the surface water into steam. Only once the surface is completely dry can its temperature climb into the browning zone.
This scientific principle elevates a simple instruction—pat the fish dry—into a non-negotiable, critical step for success. By thoroughly drying the surface of the fish with paper towels before it enters the oven, the cook is not just being fussy; they are directly intervening in the chemical process.
A dry surface allows the browning reactions to begin almost immediately, ensuring a flavorful, golden crust can form before the delicate interior of the fish has a chance to overcook. The cook, therefore, is not merely a follower of recipes but a manager of these powerful chemical reactions.
1.3 A Culinary Spectrum: Roasting vs. Baking vs. Broiling
To use an oven with precision and intent, it is essential to understand the distinct functions of its primary settings. While roasting, baking, and broiling all use the oven’s heating elements, they do so in fundamentally different ways to achieve different results. The confusion between “roasting” and “baking” is common, especially since some chefs use the term “baking” for fish regardless of temperature.
However, for the purpose of creating a browned, flavorful crust, the method applied to fish is technically roasting. Broiling represents a third, entirely different approach. The following table clarifies the key differences, providing a practical guide for selecting the right technique for any culinary task.
| Method | Temperature Range | Heat Source & Direction | Primary Purpose | Ideal Foods (with Fish Examples) |
| Roasting | High: $400^{\circ}$F – $450^{\circ}$F ($200^{\circ}$C – $230^{\circ}$C) | Ambient, all-around heat from top and bottom elements. | To create a browned, crisp exterior while cooking a solid food through. | Solid-structure foods. Whole chickens, root vegetables, large cuts of meat. For fish: Thicker fillets (salmon, cod, halibut) and whole fish (snapper, branzino). |
| Baking | Moderate: $300^{\circ}$F – $375^{\circ}$F ($150^{\circ}$C – $190^{\circ}$C) | Ambient, all-around heat from top and bottom elements. | To cook food gently and evenly, often allowing it to set or rise. | Foods without initial structure. Batters (cakes, muffins), doughs (bread), casseroles. For fish: Delicate fillets cooked in a sauce or when a browned crust is not the primary goal. |
| Broiling | Intense: $500^{\circ}$F – $550^{\circ}$F ($260^{\circ}$C – $290^{\circ}$C) | Direct, top-down heat from the upper element only. | To cook thin items quickly or to brown/char the top surface of a dish. | Quick-cooking foods. For fish: Thin fillets (tilapia, flounder), searing the skin, or browning a cheesy or breadcrumb topping. |
Section 2: The Art of Roasting Fish – From Fillet to Whole
2.1 The Perfect Candidate: Selecting Your Fish
The success of a roasted fish dish begins long before the oven is preheated; it starts at the fish counter. Selecting the right type of fish is crucial, as different species respond to the high, dry heat of roasting in different ways.
For roasting fillets, the best candidates are those with a bit of substance. Thicker, more robust fillets can withstand the intense heat without drying out, providing a wider margin for error. Oily fish are particularly well-suited for roasting. Species like salmon, sablefish (black cod), and arctic char have a higher fat content, which acts as a natural basting agent, keeping the flesh moist and succulent as it cooks.
Sturdy white fish are also excellent choices. Fillets of cod, halibut, mahi-mahi, and sea bass have a firm texture that holds up well, developing a beautiful crust while the inside remains flaky and tender.
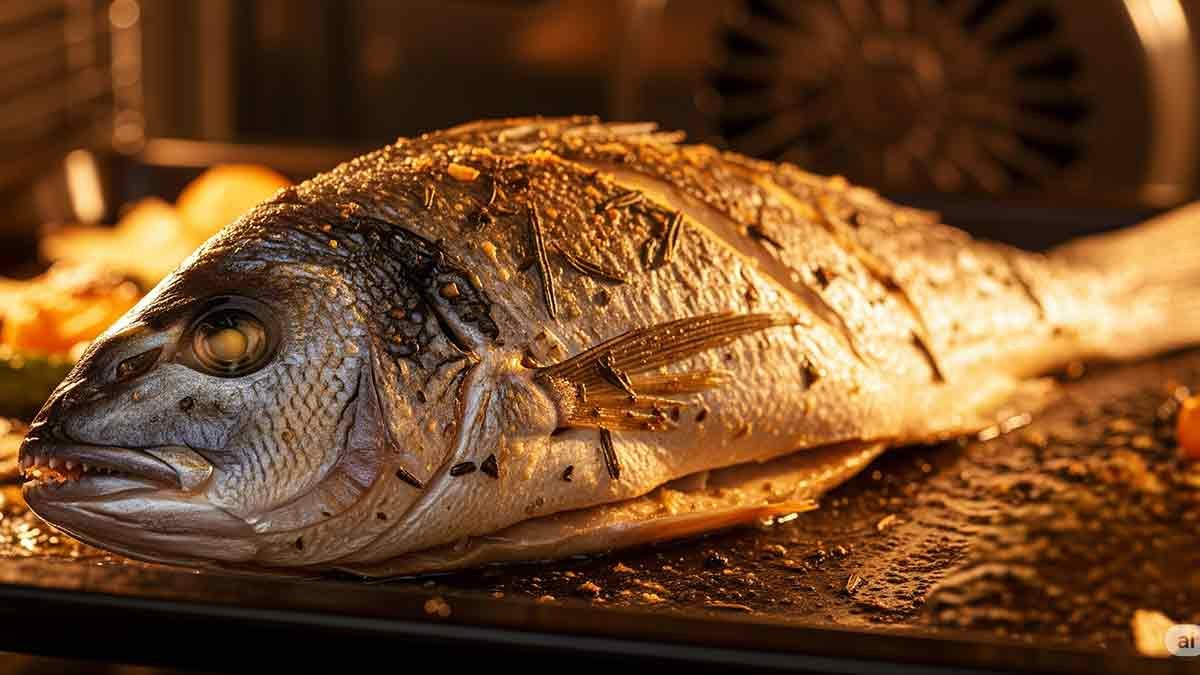
When roasting a whole fish, the structure and shape of the fish play a significant role. “Round fish“—those with a cylindrical body shape that swim upright—are generally the easiest and most rewarding to work with. Species like red snapper, branzino (European sea bass), trout, and bream (dorade) are ideal.
Cooking a fish whole, with its bones and skin intact, provides a natural barrier against the intense heat, protecting the delicate flesh and trapping moisture for an exceptionally flavorful and juicy result.
Conversely, some fish should be approached with more caution. Very lean fish like tuna and swordfish, or oily fish with a strong flavor like mackerel, can dry out quickly under high heat and require more precise temperature management and shorter cooking times.
Similarly, very thin and delicate fillets, such as those from flounder or Dover sole, are generally not ideal for high-temperature roasting as they can overcook in an instant. These are often better suited for gentler methods like pan-frying or baking in a protective sauce.
2.2 The Whole Story: A Masterclass in Roasting Whole Fish
Roasting a whole fish is one of the most impressive yet surprisingly simple culinary feats. It delivers unparalleled flavor and makes for a dramatic centerpiece. Success lies in a few key preparation and cooking steps.
Selection and Preparation: The process begins with selecting a fresh fish. Look for one with plump, clear eyes, bright red or orange gills, and firm flesh that springs back when pressed. The fish should smell clean and of the ocean, not overtly “fishy.” To simplify preparation, it is highly recommended to have the fishmonger gut, scale, and clean the fish.
Once home, the single most important step is to pat the fish thoroughly dry, both inside the cavity and all over the exterior, with paper towels. A dry surface is essential for achieving a crisp skin.
Scoring the Skin: Before seasoning, use a sharp knife to make three to four diagonal slashes into the thickest part of the flesh on both sides of the fish, cutting just down to the bone. This step is functional, not merely decorative.
The scores allow heat to penetrate the thickest parts of the fish more evenly, ensuring the entire fish cooks at the same rate. They also create channels for seasonings to permeate the flesh and prevent the skin from shrinking and curling unattractively during cooking.
Seasoning and Stuffing: Generously season the fish inside and out with salt and pepper, then rub it all over with a good quality olive oil. The cavity, now a protected pocket of flavor, should be stuffed with aromatics. Classic choices include thin slices of lemon, sprigs of fresh herbs like parsley, thyme, oregano, or dill, and a few crushed garlic cloves. These ingredients will gently steam inside the fish as it roasts, infusing the flesh with subtle flavor from within.
Roasting and Doneness: Place the prepared fish on a parchment-lined baking sheet and roast in a preheated oven at a high temperature, typically between $400^{\circ}$F and $450^{\circ}$F ($205^{\circ}$C and $230^{\circ}$C). A 1-pound fish will take approximately 15-20 minutes, while a larger 2-pound fish may take 20-25 minutes.
There are several reliable ways to check for doneness. The most accurate method is to use an instant-read thermometer inserted into the thickest part of the fish, avoiding the bone; it should register between
$135^{\circ}$F and $145^{\circ}$F ($57^{\circ}$C and $63^{\circ}$C). Visual cues are also effective: the flesh should be opaque and flake easily when prodded with a fork, and the fins should pull away from the body with little to no resistance.
2.3 The Fillet Focus: Techniques for Perfect Portions
Roasting fish fillets requires a slightly different approach than roasting a whole fish, with a keen focus on promoting even cooking and preventing the delicate flesh from drying out.
Preparation is Key: As with all roasting, the process must begin with a dry surface. Pat the fillets thoroughly with paper towels to remove any excess moisture, which would otherwise steam the fish and inhibit browning. A common challenge with fish fillets, such as those from salmon or cod, is their uneven thickness.
The tail end is often much thinner than the center loin portion. To ensure even cooking, a simple but effective technique is to tuck the thin tail end of the fillet underneath itself. This creates a piece of fish with a more uniform thickness, preventing the delicate edges from overcooking and turning dry while the thicker center is still coming to temperature.
Seasoning and Cooking: Before roasting, brush the fillets with a layer of fat, such as olive oil or melted butter. This not only adds flavor but also helps to conduct heat, promote browning, and create a barrier that helps lock in moisture. Season the fillets generously with salt and pepper.
A reliable guideline for timing is the “10-minute rule”: for every inch of thickness, roast the fish for approximately 10 minutes in a hot oven, between $400^{\circ}$F and $450^{\circ}$F ($200^{\circ}$C and $230^{\circ}$C).22 For example, a 1.5-inch thick salmon fillet would roast for about 15 minutes.
This rule is a starting point, and final doneness should always be confirmed by checking for opaque, flaky flesh or using an instant-read thermometer.
Section 3: The Flavor Architect – Seasonings, Marinades, and Pairings
3.1 The Foundation of Flavor: Herb & Spice Rubs
The flavor profile of a roasted fish can be endlessly customized through the thoughtful application of herbs and spices. A dry rub not only seasons the fish but can also help to form a delicious crust.
The foundation of any rub is salt and pepper, but from there, a world of possibilities opens up. For a classic, fresh flavor, herbs that pair beautifully with fish include dill, parsley, tarragon, thyme, and basil. For a deeper, earthier profile, spices like smoked paprika, cumin, coriander, and ginger can be incorporated.
A simple yet effective Lemon Herb Seasoning might combine lemon pepper, dried parsley, thyme, garlic powder, and smoked paprika, while a Greek-inspired rub could feature oregano, rosemary, thyme, and a hint of mint.
A more nuanced approach is required when seasoning a whole fish, differentiating between the exterior skin and the interior cavity. The skin is exposed to the highest, most direct heat of the oven. Applying delicate dried herbs to the exterior will cause them to scorch at typical roasting temperatures (above $400^{\circ}$F), resulting in a bitter, acrid taste. Therefore, the exterior of the fish should be seasoned simply with a high-smoke-point oil and a generous amount of salt.
This minimalist approach allows the skin to crisp up perfectly without burning the seasonings. The protected inner cavity, however, is the ideal environment for more delicate aromatics. Stuffing the cavity with sprigs of fresh herbs, lemon slices, and garlic allows them to gently steam, releasing their essential oils and infusing the flesh with a deep, aromatic flavor from the inside out. This differential strategy optimizes for two distinct goals: a perfectly crisp, savory skin on the outside and a moist, herb-infused flesh on the inside.
3.2 The Acid Test: Marinades and Citrus Pairings
Wet seasonings, particularly marinades, offer another avenue for flavoring fish, but they operate under a different set of rules than those for heartier meats. The key element in most fish marinades is acid—typically from citrus juice or vinegar—which has a profound effect on the delicate protein structure of fish.
Unlike the tough connective tissues in beef or pork, fish flesh is tender and requires no tenderizing. The purpose of marinating fish is purely for rapid flavor infusion. The acid in the marinade begins to denature the proteins in the fish on contact, in a process chemically similar to cooking with heat. This is the same principle behind ceviche, where raw fish is “cooked” entirely in citrus juice.
Because of this powerful chemical reaction, marination times for fish must be kept short. For most fillets, 15 to 30 minutes is sufficient to impart flavor without compromising texture. Marinating for longer, especially in a highly acidic mixture, will “overcook” the fish, turning its texture from flaky and tender to soft and mushy.
A well-constructed fish marinade balances acid with fat and aromatics. Common flavor profiles include:
- Zesty Lemon-Herb: A classic combination of lemon juice, olive oil, fresh herbs like thyme and basil, and minced garlic.49
- Savory Soy-Ginger: A blend of soy sauce, citrus juice (like orange), honey, fresh ginger, and garlic, perfect for richer fish like salmon or mahi-mahi.
- Spicy Chermoula-Style: A bold North African-inspired marinade featuring parsley, cilantro, garlic, cumin, paprika, and lemon juice.49
- Rich Miso: A Japanese-style marinade made with miso paste, sake or mirin, and a touch of sugar, famously paired with black cod.
The classic pairing of fish and citrus is rooted in this science. The bright acidity of lemon, lime, orange, or grapefruit cuts through the richness of oily fish and balances the natural briny flavors of all seafood. An amusing historical anecdote suggests the pairing originated from the belief that lemon juice could dissolve any stray fish bones one might accidentally swallow. Whether used in a marinade, squeezed over the finished dish, or roasted in slices alongside the fish, citrus is an indispensable tool for the flavor architect.
3.3 The One-Pan Symphony: Roasting Fish with Vegetables
The sheet-pan dinner, combining fish and vegetables on a single pan, has become a weeknight staple due to its convenience and minimal cleanup. However, achieving a perfectly cooked meal where the fish is moist and flaky and the vegetables are tender and caramelized requires more than simply tossing everything into a pan at once. The key to success is staged cooking, a method that respects the vastly different cooking times of various ingredients.
The process should be approached in stages:
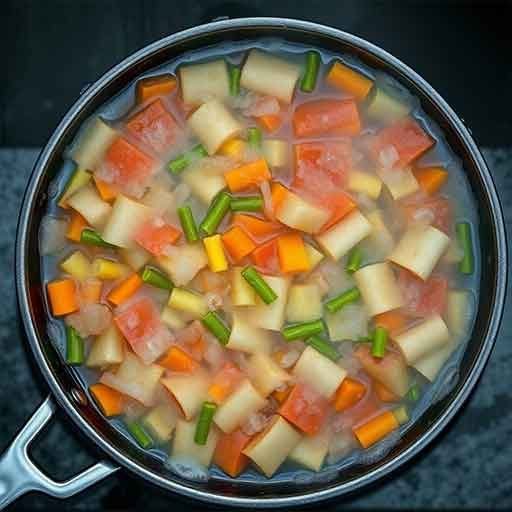
- Stage 1: Hard and Root Vegetables. Dense, hard vegetables require the longest cooking time. Vegetables like potatoes, carrots, sweet potatoes, and parsnips should be cut into uniform, bite-sized pieces, tossed with oil and seasoning, and given a 15- to 20-minute head start in a hot oven (
$400^{\circ}$Fto$425^{\circ}$F/$205^{\circ}$Cto$220^{\circ}$C). - Stage 2: Medium-Density Vegetables. After the initial roast, vegetables that cook a bit faster, such as broccoli or cauliflower florets, fennel, and onions, can be added to the pan and roasted for another 10-15 minutes.
- Stage 3: Fish and Delicate Vegetables. In the final stage, the fish fillets are placed on the pan alongside quick-cooking, delicate vegetables. Asparagus spears, cherry tomatoes, sliced zucchini, and green beans need only 10 to 15 minutes to become tender-crisp, which aligns perfectly with the cooking time for most fish fillets.
By staggering the addition of ingredients, the cook ensures that everything finishes cooking at the same moment. The following table provides a practical timetable to help guide the creation of custom sheet-pan meals, moving beyond a single recipe to a versatile cooking template.
| Vegetable Type | Recommended Cut Size | Approx. Roasting Time at 425°F (220°C) | Staging Notes |
| Root Vegetables (Potatoes, Carrots, Parsnips, Beets) | 3/4-inch to 1-inch chunks | 30-45 minutes | Stage 1: Roast for 15-20 minutes before adding other ingredients. |
| Hard Squashes (Butternut, Acorn) | 1-inch chunks | 30-40 minutes | Stage 1: Roast for 15-20 minutes before adding other ingredients. |
| Cruciferous Veg (Broccoli, Cauliflower, Brussels Sprouts) | 1-inch florets/halved | 20-25 minutes | Stage 2: Add to the pan for the final 20-25 minutes of cooking. |
| Onions, Fennel | 1-inch chunks or wedges | 20-30 minutes | Stage 2: Add with cruciferous vegetables or give a 10-minute head start before fish. |
| Bell Peppers, Mushrooms | 1-inch pieces | 15-20 minutes | Stage 3: Add alongside the fish. |
| Delicate Veg (Asparagus, Green Beans, Zucchini, Tomatoes) | Whole spears/beans, 1/2-inch slices | 10-15 minutes | Stage 3: Add alongside the fish for the final 10-15 minutes. |
| Leafy Greens (Spinach, Kale) | Whole leaves | 5-7 minutes | Stage 3: Add for the final 5-7 minutes, as they wilt quickly. |
Section 4: The Masterclass – Troubleshooting and Advanced Techniques
4.1 The Pursuit of Crispiness: Achieving Perfect Fish Skin
For many culinary enthusiasts, a perfectly crisp, shatteringly brittle fish skin is the ultimate prize. Achieving this coveted texture is not a matter of luck but of meticulously controlling moisture and heat.
The primary antagonist in the quest for crispiness is water. Skin cannot become crisp until it is first completely dry; any surface moisture will cause it to steam rather than fry in the hot pan. Therefore, an arsenal of drying techniques is essential:
- Pat Dry: The most basic and crucial step is to thoroughly pat the fish skin with paper towels until it feels dry to the touch.
- Air-Dry: For an even drier surface, place the fish fillet on a rack, skin-side up, and refrigerate it uncovered for at least an hour before cooking. The cold, circulating air of the refrigerator acts as a powerful dehumidifier, wicking away residual moisture.
- Scrape Dry: An advanced technique involves using the spine of a knife to gently scrape across the surface of the skin. This action physically squeegees moisture from the skin, which can then be wiped away.
Once the skin is bone-dry, the execution must be precise. The best results are achieved not in the oven alone, but with a combination stove-to-oven method. Start with a heavy-bottomed pan, such as cast iron or carbon steel, heated over medium-high heat.
Add a high-smoke-point oil (like canola or avocado oil; butter contains water and will hinder crisping) and heat it until it shimmers and sends up the first wisps of smoke.
Place the fish skin-side down in the hot pan and immediately apply gentle, even pressure with a flexible spatula for 10 to 30 seconds. This critical step flattens the fillet and ensures the entire surface of the skin makes contact with the hot pan, preventing the center from curling up and creating a soggy pocket.
Sear the fish on the stovetop for 2-3 minutes, until the skin is golden and crisp. For thicker fillets, transfer the entire pan directly into a preheated hot oven ($400^{\circ}$F / $200^{\circ}$C) to finish cooking the flesh through gently with ambient heat, without needing to flip the fish. This hybrid method delivers the best of both worlds: the intense, conductive heat of the pan for a perfect sear, and the gentle, even heat of the oven to cook the flesh to a perfect, flaky doneness.
4.2 The Moisture Mandate: How to Never Eat Dry Fish Again
The most common failure in fish cookery is producing a dry, chalky, and unappetizing piece of fish. This is almost always the result of one single error: overcooking. As fish cooks, its proteins contract and squeeze out moisture. When overcooked, this process goes too far, leaving the flesh tough and dry.
The most reliable tool to combat overcooking is an instant-read thermometer. The USDA recommends a safe internal temperature of
$145^{\circ}$F ($63^{\circ}$C) for fish. However, a crucial scientific principle to understand is
carry-over cooking. Food continues to cook from residual heat even after it is removed from the oven, with its internal temperature rising by another 5 to 10 degrees. Therefore, to hit a perfect final temperature, the fish should be pulled from the heat source when its internal temperature reads
$135^{\circ}$F to $140^{\circ}$F ($57^{\circ}$C to $60^{\circ}$C). After a brief rest of 3-5 minutes, the temperature will climb to the ideal point, and the juices will have had a chance to redistribute throughout the fillet, resulting in a significantly moister piece of fish.
For a virtually foolproof method of ensuring moisture, one can turn to the classic French technique of cooking en papillote, or in a parchment paper packet. In this method, the fish is sealed in a parchment pouch along with aromatics, vegetables, and a small amount of liquid (like wine or citrus juice).
As the packet heats in the oven, it traps the steam released by the ingredients, creating a miniature steam-roasting environment. This gentle, moist heat cooks the fish perfectly while preventing any moisture loss and simultaneously creating a flavorful, self-contained sauce.
This highlights a sophisticated understanding of the roasting process for a delicate protein like fish. While roasting is technically a dry-heat method, the most successful applications are actually hybrid methods. The goal is to manage moisture strategically: using fats, surrounding vegetables, or an en papillote packet to create a protective, moist micro-environment for the fish’s interior, while still allowing the exterior to be exposed to enough dry, high heat to achieve the desirable browning from the Maillard reaction.
4.3 The Great Unsticking: A Guide to Flawless Release
The fear of fish sticking to the cooking surface is a common source of anxiety for home cooks. The image of a beautiful fillet tearing apart, leaving its precious skin and a portion of its flesh welded to the pan, is a frustrating one. This sticking is a result of chemical bonds forming between the proteins in the fish and the metal of the pan, a reaction that is exacerbated by excess moisture and improper temperature control.
Preventing this requires a systematic approach:
- A Dry Surface: A thoroughly dried fish surface is paramount. Moisture creates steam, which inhibits the formation of a crust and promotes sticking.
- Hot Pan, Hot Oil: The pan must be preheated before adding the oil. Once the pan is hot, add the oil and heat it until it shimmers. Placing fish in a properly heated pan sears the surface proteins instantly, creating a crust that acts as a natural barrier against sticking.
- Sufficient Fat: A layer of oil or butter provides a physical barrier between the fish and the pan, lubricating the surface and preventing direct contact.
- Patience: Perhaps the most difficult step is to do nothing. Do not attempt to move or flip the fish prematurely. Once a proper sear has formed, the proteins will naturally release from the pan. Trying to force it before it’s ready will inevitably cause tearing.
For oven roasting, the simplest way to guarantee a non-stick experience is to use parchment paper. Lining a baking sheet with parchment paper creates an effective non-stick surface for fillets or whole fish. A light coating of oil on the parchment itself adds an extra layer of insurance.
For those seeking crispy skin via the stove-to-oven method, there is a game-changing technique: the parchment paper sling. Cut a piece of parchment paper to be just slightly larger than the fish fillet. Place this piece of parchment directly into the preheated, oiled pan. Add a bit more oil on top of the parchment, then place the fish skin-side down onto the paper.
The parchment creates an infallible non-stick barrier between the fish and the pan. Because the paper is thin and saturated in hot oil, it allows for perfect heat transfer, rendering the skin just as crispy as it would be with direct contact, but with zero risk of sticking. This simple hack removes the primary source of stress from the process, allowing the cook to focus entirely on achieving a perfect result.
Conclusion: Your Roasting Repertoire
The journey through the world of roasting fish reveals a clear truth: true culinary skill is not born from memorizing recipes, but from understanding principles. Roasting is far more than a simple instruction to “place in oven”; it is the deliberate management of heat, the careful control of moisture, and the artful orchestration of the chemical reactions that create flavor and texture.
By grasping the science behind the Maillard reaction and caramelization, the cook learns that a dry surface is not a suggestion, but a prerequisite for a golden-brown crust. By understanding the distinct roles of roasting, baking, and broiling, the oven transforms from a mysterious box into a versatile tool with a spectrum of precise functions. The knowledge of how to select the right fish, how to season it strategically, and how to pair it with vegetables in a staged, one-pan symphony elevates a simple meal into a thoughtful composition.
The techniques for achieving shatteringly crisp skin, ensuring a moist and flaky interior, and guaranteeing a flawless, stick-free release are not secrets, but skills built upon these foundational principles. This guide is intended not as a set of rigid rules, but as a “Roaster’s Compass”—a reliable instrument to navigate the vast possibilities of fish cookery. Armed with this knowledge, the cook is no longer a follower of instructions, but a true culinary architect, empowered to explore, experiment, and confidently create their own signature roasted fish dishes.
